Waitlists
How to use waitlisting in eServices
The waitlist option is offered on a first-come, first-served basis for select courses when a class is full. This option is not available for every class.
Adding yourself to the waitlist
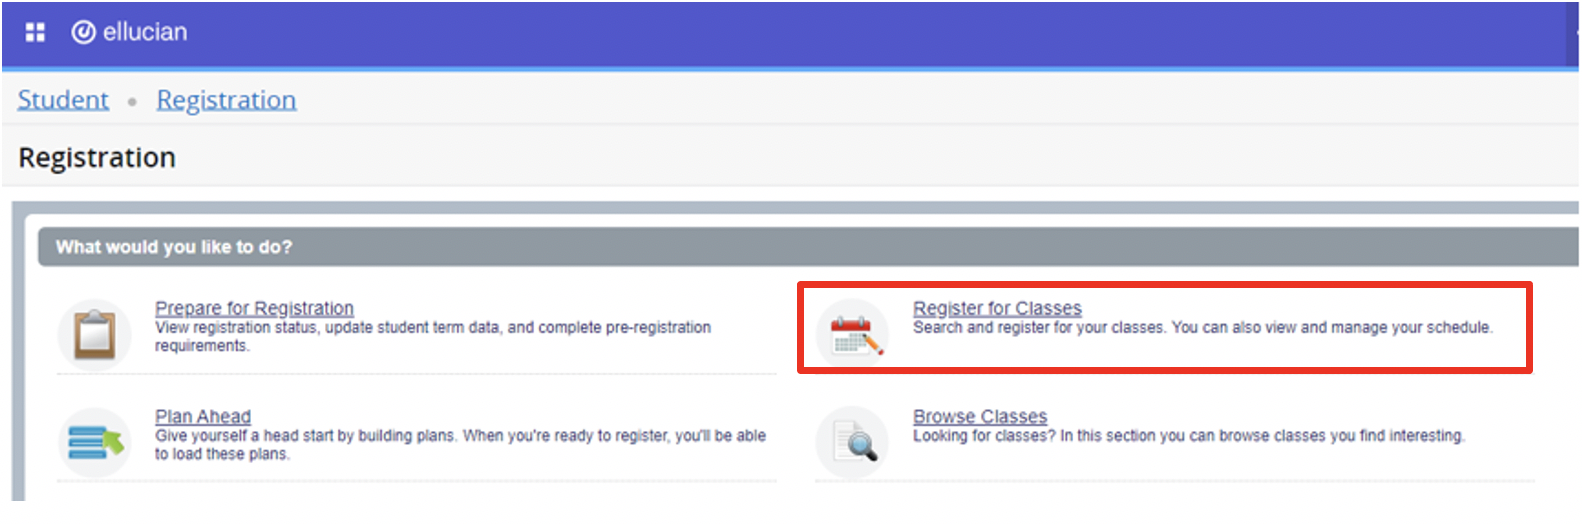
From eServices Registration section, select Register for Classes.
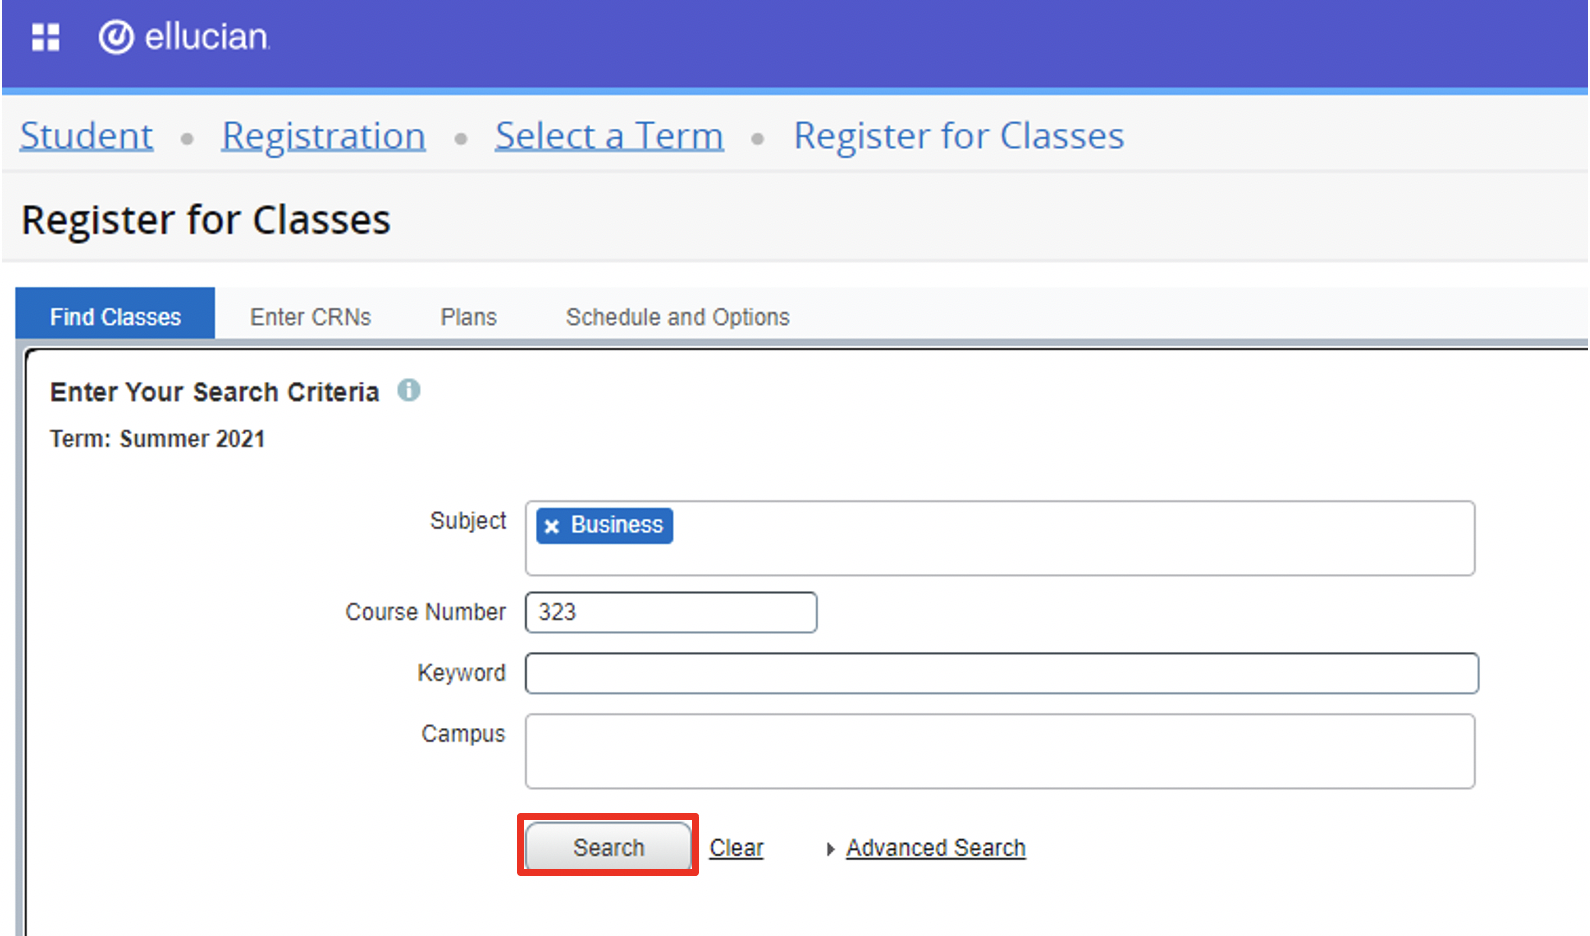
Select the term of registration and click Continue

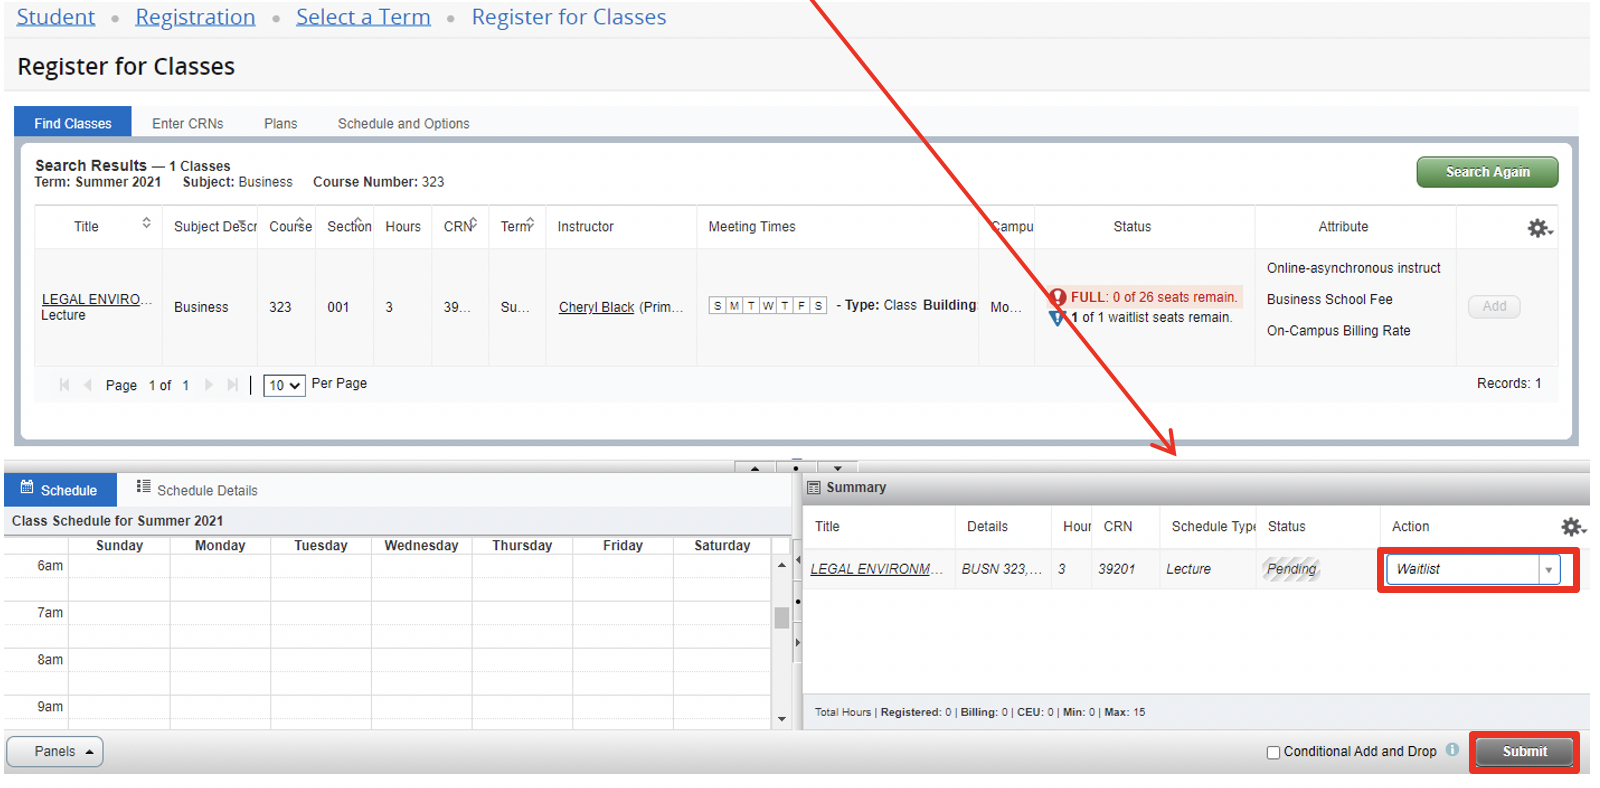
Perform a search for the course in which you are interested.
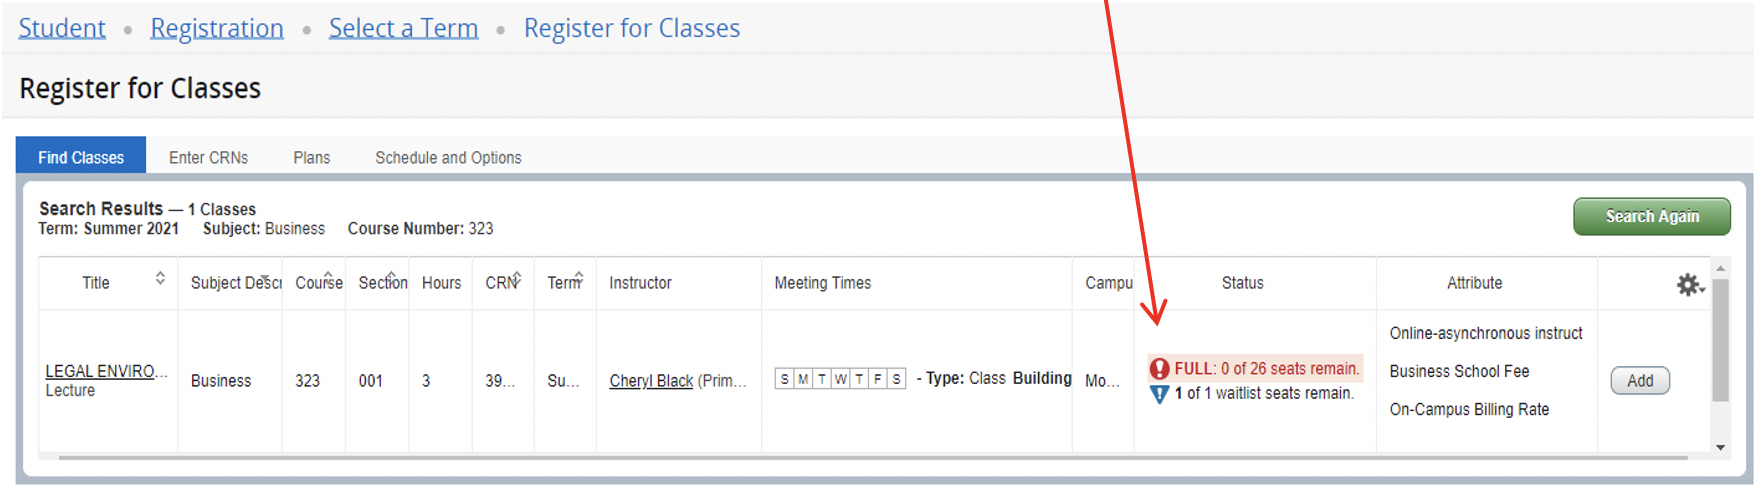
If a class is full and can be waitlisted, you can identify the number of waitlist seats remaining listed under “Status”: Example “1 of 1 waitlist seats remain”
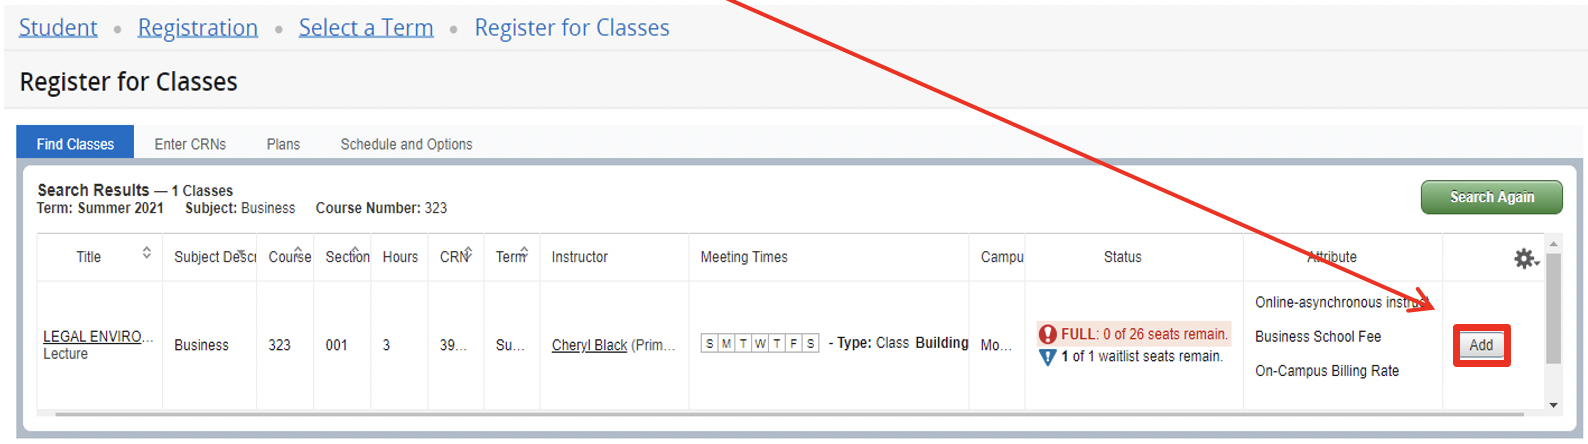
To add yourself to the waitlist, select “Add”. This will add the course to the “Summary” section.
Click the drop-down menu listed under “Action”, select “Waitlist” and then click “Submit”.
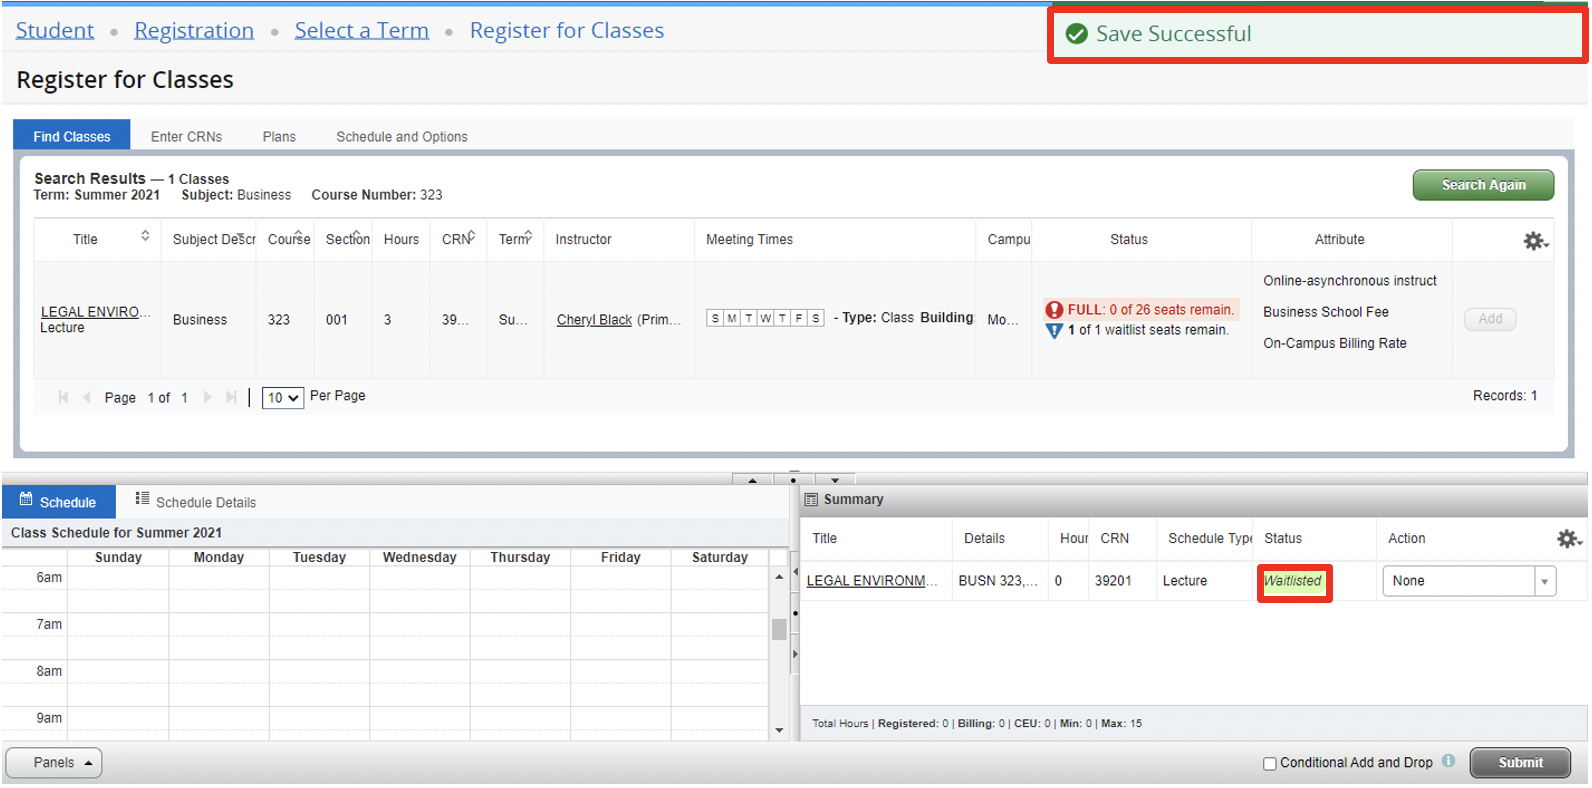
Once you have successfully added yourself to the waitlist, the status will change from “Pending” to “Waitlisted” and you will receive a “Save Successful” confirmation message.
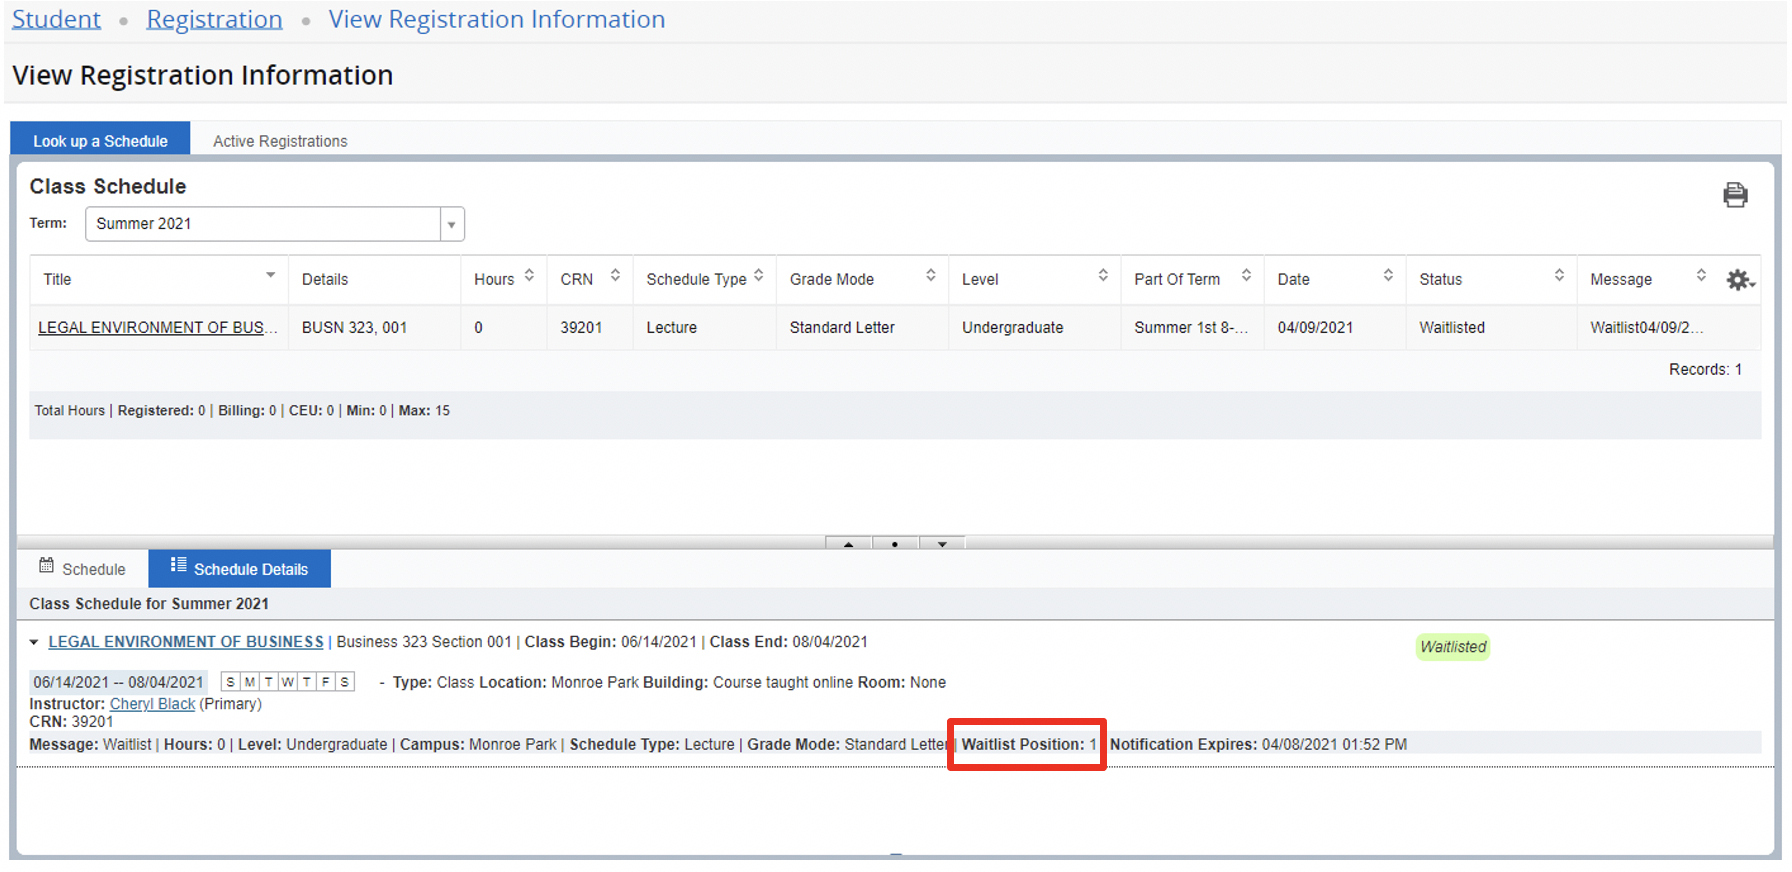
Viewing your Position on the Waitlist
To view your position on the waitlist, go to SCHEDULE DETAILS, find the waitlisted class and look for WAITLIST POSITION. The number shows your position on the waitlist.
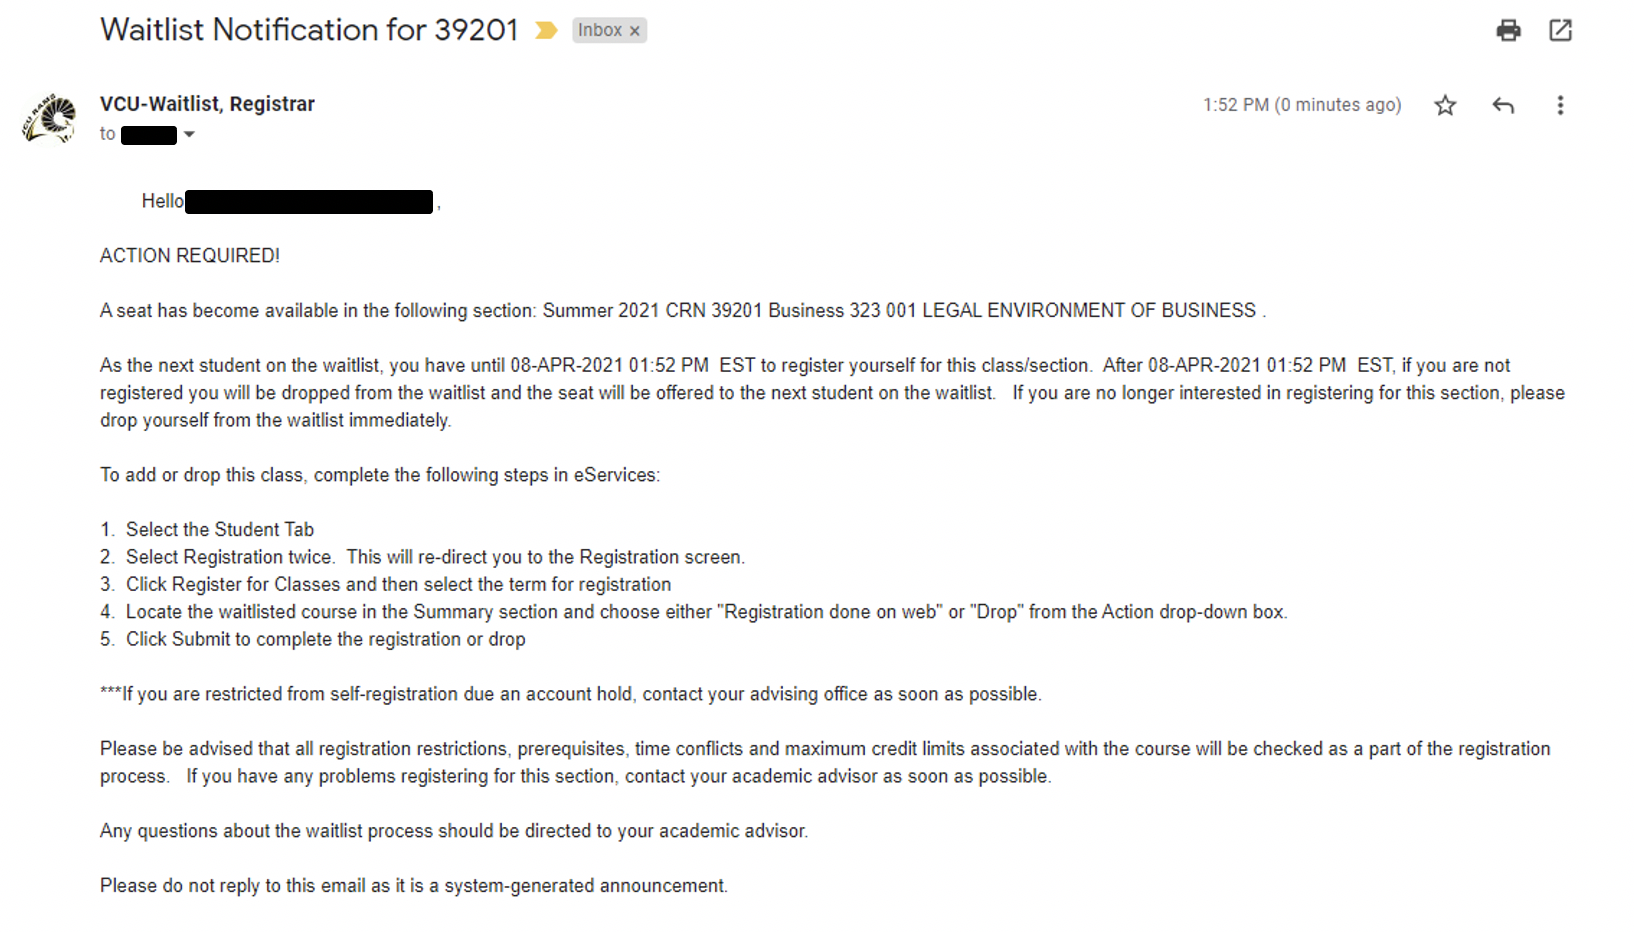
Receiving the Notification
If an opening in your waitlisted course becomes available, an email will be sent to your vcu email account. You will have 24 hours from the time the message is sent to register for the course before you are automatically dropped from the waitlist.
To register for the class once a seat becomes available:
1. Select the Students Tab.
2. Click Register for Classes and then select the term for registration.
3. Locate the waitlisted course in the Summary section and choose either "Registration done on web" or "Drop" from the Action drop-down box.
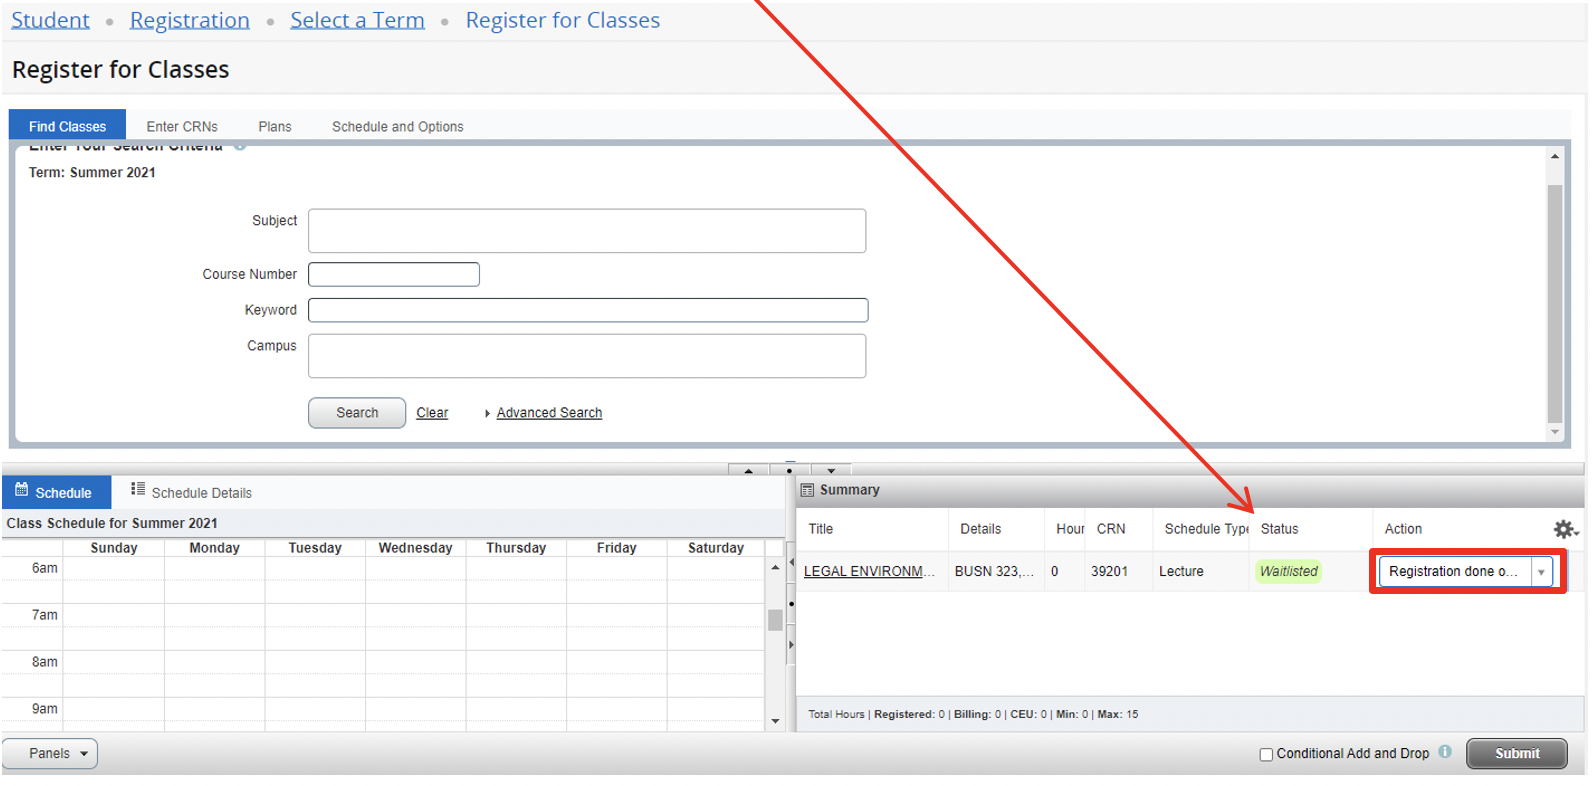
4. Click Submit to complete the registration or drop.
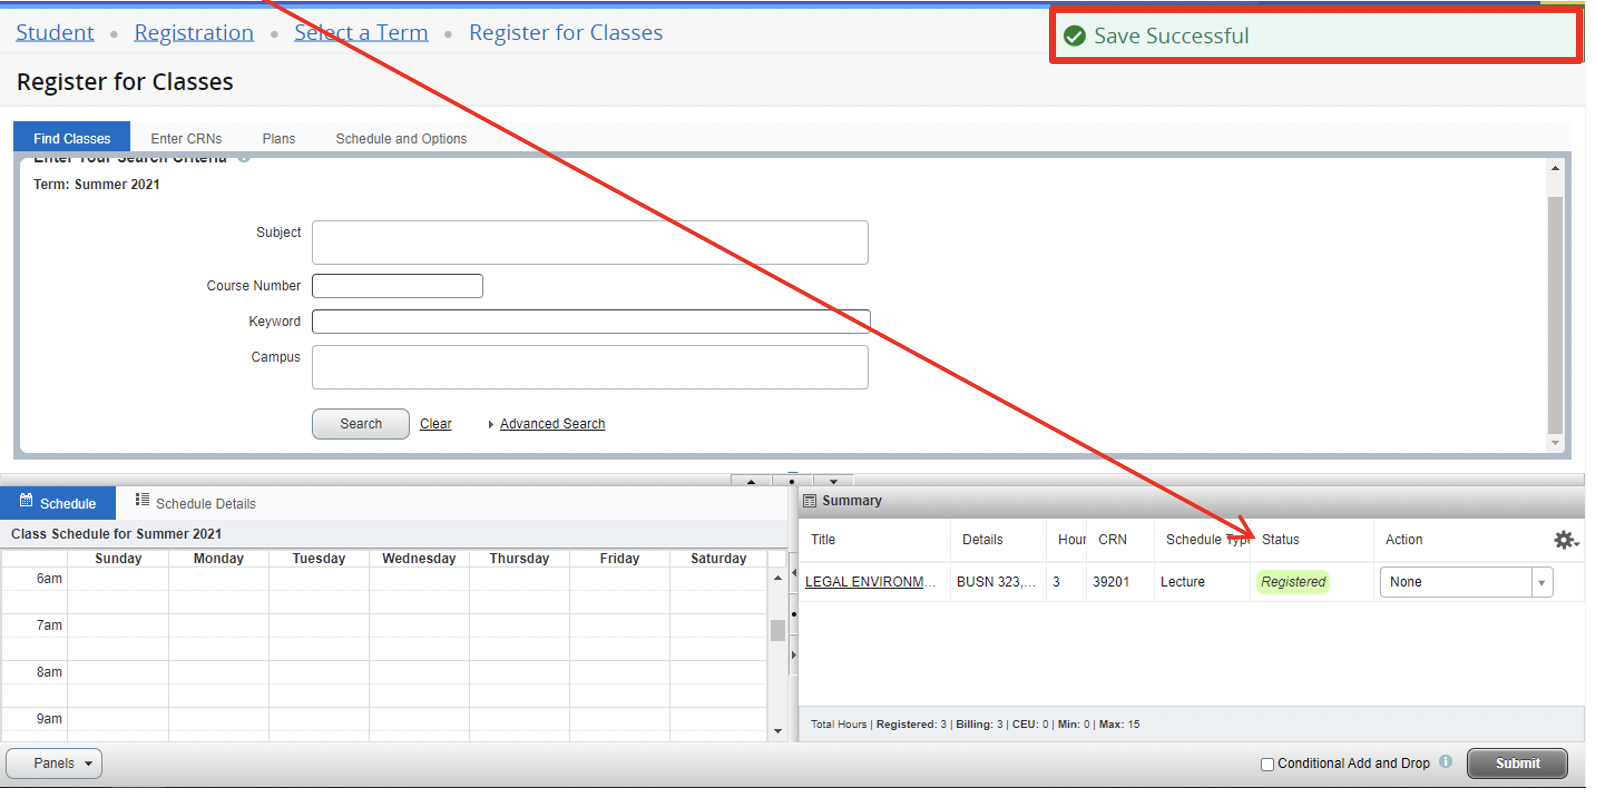
5. Once you have successfully registered for the course, the status will change from “Waitlisted” to “Registered” and you will receive a “Save Successful” confirmation message.
Special Advisory:
If a course that offers waitlisting displays seats remaining on the Schedule of Classes but also has seats filled on the waitlist, please don’t drop yourself from a class in which you are already enrolled in anticipation that you will be able to register for the waitlisted course. Priority is given to the first student on the waitlist. In addition, all remaining seats are reserved for those students on the waitlist.
Waitlist Deactivation:
Please be advised that the waitlist option is available during the entire early registration period. The waitlist option deactivates at 11:59 p.m. approximately three business days prior to the start of the add/drop period for each semester - this includes the multiple add/drop periods for the summer semester. Students who are still on the waitlist at the time of deactivation, will be automatically removed. This provides the opportunity to find a replacement course. Please refer to the Schedule of Classes for available courses.